










How to become a Urbanese vendor
A simple, flexible joining process. Here’s everything you’ll need and what happens at each step.

Introduction
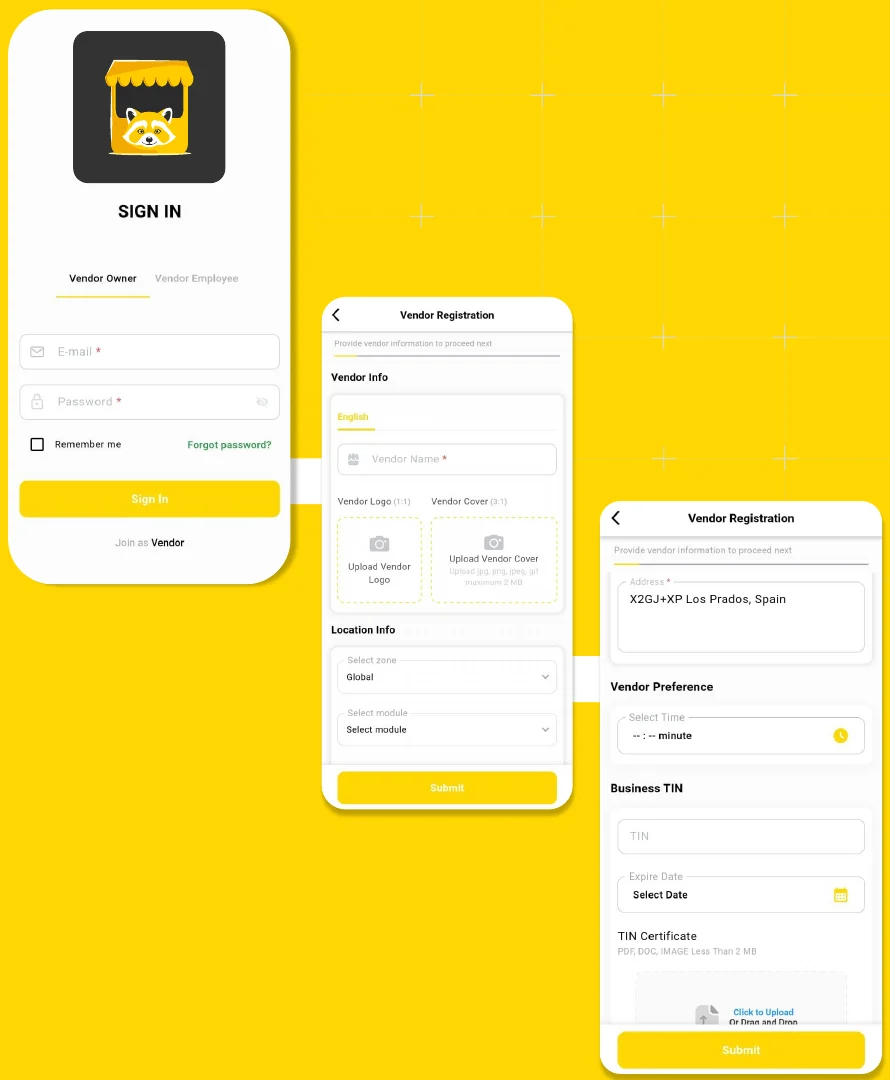
Joining Urbanese is free: Rs 0 registration fee and no upfront cost. You can register on this website or in the Urbanese Seller Centre app.
Who can register
- Individual vendors: sole traders and people running a business in their own name.
- Business vendors: registered companies, who also provide company details.
- Any lawful business can apply. Businesses that are not legal in Pakistan are not allowed.
- One account per business type. If you run, say, a restaurant and a grocery shop, register each separately.
- Launching soon? You can register for Pre-Owned Marketplace now, and start selling once it launches.
What you’ll need
Have these ready before you start:
Individual Vendor
Owner information
- First & last name
- Phone & secondary phone
- Address, city & country
Identity verification
- ID type & number
- ID front & back (photo)
- Proof of address type & file
Store information
- Store name & address
- Logo (required) & cover photo
- Approx. delivery time
- Business type
- City and area (zone) & map pin
Account
- Password
Business Vendor
Owner information
- First & last name
- Phone & secondary phone
- Address, city & country
Identity verification
- ID type & number
- ID front & back (photo)
- Proof of address type & file
Company information
- Company name
- Company NTN number
- Company phone & address
- Company proof of address
- Incorporation certificate
Store information
- Store name & address
- Logo (required) & cover photo
- Approx. delivery time
- Business type
- City and area (zone) & map pin
Account
- Password
Accepted ID documents
- CNIC
- NICOP
- Passport
- Driving License
Accepted proof of address
- Utility Bill
- Bank Statement
- Account Maintenance Certificate
| Upload | Format |
|---|---|
| Logo (required) | Square, 1:1 · JPEG, JPG, PNG, GIF or WEBP, under 2 MB |
| Cover photo (optional) | Wide · JPEG, JPG, PNG, GIF or WEBP, under 2 MB |
| ID document front & back | Photo · JPEG, JPG, PNG, GIF or WEBP, under 2 MB |
| Proof of address, incorporation certificate | PDF, DOC, DOCX, JPG or PNG, under 2 MB |
Step-by-step registration
- Choose your vendor typeIndividual or Business. Business adds a Company Info step.
- Add owner informationYour name, primary and secondary phone, address, city and country.
- Verify your identityID type, number, front and back, plus proof of address. Business vendors add company details.
- Add store informationStore name and address, logo, cover photo and approximate delivery time.
- Choose your business type, then your city and areaThe cities and areas you can pick depend on your business type. Then place your store pin inside your area: search your address or use your current location.
- Create your accountYour email and a password.
- Choose your business planPick a commission package, then Complete Registration.
Store information
Your store information tells customers who you are, and your area and map pin help Urbanese show your store to the right customers.
- Store name & address
- Logo (required) & cover photo
- Approx. delivery time
- Business type
- City and area (zone) & map pin
Your approximate delivery time (a minimum and maximum, in minutes, hours or days) sets customer expectations, so choose a range you can meet consistently.
Choosing your business type
Pick the business type that best matches what you sell. Each store belongs to one business type, and the cities and areas you can choose depend on it. Parcel is Urbanese’s own courier service, so stores don’t register under it.
Grocery
Sell groceries and daily essentials to customers nearby.
Pharmacy
List medicines and health products for delivery.
Markett
Open a retail storefront for fashion, electronics and more.
Urban Eats
Take food orders from hungry customers in your area.
Rental
List items and vehicles customers can rent.
Digital Service
Sell courses and digital products to Urbanese customers.
Local Service
Open a retail storefront for fashion, electronics and more.
Pre-Owned Marketplace
Give pre-owned products a second life with new buyers.
Launching soonNew Local
Get booked for home and local services in your city.
KYC & documentation
What you provide depends on whether you register as an individual or a business. Watch the tutorial for your vendor type.
Individual Vendor
Owner information
- First & last name
- Phone & secondary phone
- Address, city & country
Identity verification
- ID type & number
- ID front & back (photo)
- Proof of address type & file
Store information
- Store name & address
- Logo (required) & cover photo
- Approx. delivery time
- Business type
- City and area (zone) & map pin
Account
- Password
Business Vendor
Owner information
- First & last name
- Phone & secondary phone
- Address, city & country
Identity verification
- ID type & number
- ID front & back (photo)
- Proof of address type & file
Company information
- Company name
- Company NTN number
- Company phone & address
- Company proof of address
- Incorporation certificate
Store information
- Store name & address
- Logo (required) & cover photo
- Approx. delivery time
- Business type
- City and area (zone) & map pin
Account
- Password
Accepted ID documents
- CNIC
- NICOP
- Passport
- Driving License
Accepted proof of address
- Utility Bill
- Bank Statement
- Account Maintenance Certificate
Licences: some business types need a valid licence, for example Pharmacy: a valid drug sale licence is required; Urban Eats: a valid food authority licence is required.
Verification
After you submit, Urbanese reviews your information and documents. Accounts are usually approved within 24 to 48 hours, and you’ll be notified at the email address you registered with. Until then, signing in shows “Admin did not approve your registration yet”.
Store set-up
- Sign inUse your email and password on the Login page.
- Add a disbursement methodWallet Management → Disbursement Method. Your dashboard reminds you until you do.
- List your itemsUse the item form, the AI assistant, AI Product Listing or bulk import. No product limits.
- Set your hours and optionsOpening hours, delivery settings, minimum order and low-stock warning.
- Start receiving ordersUrbanese riders deliver your orders, and new orders play a sound and pop up in your panel.
Training videos
Official walkthroughs from the Urbanese team. Videos play right here on the page.
Frequently asked questions
No. Registration is free: Rs 0 with no upfront costs. Every store is on the commission model, so there’s no subscription to buy.
Select “Become a Vendor”. You’ll choose Individual or Business, add owner and identity details, set up your store (business type, zone and map location), create your login and choose a commission package.
Any lawful business can apply. Businesses that are not legal in Pakistan are not allowed on Urbanese.
Yes. Each store belongs to one business type, so each needs its own vendor account.
Yes. You can register for Rental or the Used Products Marketplace now. You’ll be able to sell once that business type officially launches.
Parcel is Urbanese’s own courier service, so stores don’t register under it. You can book an Urbanese parcel from your Vendor Panel instead.
Yes. Create employee roles and accounts in your Vendor Panel, and your staff sign in using Employee Login.
Use “Forgot password?” on the login page and we’ll email you a reset link.
ID: CNIC, NICOP, Passport or Driving License, with the ID number and front and back images.
Proof of address: Utility Bill, Bank Statement or Account Maintenance Certificate.
Business vendors also add company name, NTN number, address, city, country, phone, an incorporation certificate and company proof of address.
Yes, where your business type requires one. For example, Pharmacy needs a drug sale licence and Urban Eats needs a food authority licence.
Usually 24 to 48 hours. You’ll be notified at the email you registered with. Until then, logging in shows “Admin did not approve your registration yet”.
Documents: PDF, DOC, JPG or PNG. Logo and cover: JPEG, JPG, PNG, GIF or WEBP, under 2 MB.
Ready to start?
Registration is free. Questions first? Request a call or email vendorsupport@urbanese.com.